[记]部署MkDocs
时间: 2022.12.09
基本介绍
最近做一个简单的个人知识整理系统,参考简单的原则,经过和多个已有的方案做对比,最后选择了MkDocs框架,该框架后端使用python构建。下面将对安装和配置过程做简要说明:
mkdocs-material: 文档
环境设置
系统:MacOS
环境:node-12.16.1, python3-3.7.6
MkDocs目前仅支持Python2.7 3.4 3.6 3.7版本
安装过程
- 安装
MkDocs:
pip install mkdocs
- 检查是否安装成功:
mkdocs --version

> mkdocs, version 1.4.2 from ~/lib/python3.7/site-packages/mkdocs (Python 3.7)
- 创建一个Wiki
cd target_dir
mkdocs new my-wiki
cd my-wiki
ls

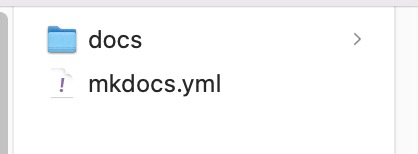
> docs            mkdocs.yml
- 回到本地文件夹可以看到项目目录下有下面内容:
- 启动wiki
mkdocs serve

> INFO     -  Building documentation...
> INFO     -  Cleaning site directory
> INFO     -  Documentation built in 0.08
              seconds
> INFO     -  [15:06:23] Watching paths for
              changes: 'docs', 'mkdocs.yml'
> INFO     -  [15:06:23] Serving on
              http://127.0.0.1:8000/
使用
- 添加新的文字内容
在docs文件夹下面创建doc.md文件,并使用markdown语法编辑内容,如下样例:
This is a new page.

# 一级标题

## 二级标题

### 三级标题
- 修改
mkdocs.yml文件来修改标题栏,不修改则默认读取文件夹名为标题栏
nav:
    - Home: index.md
    - First: first.md
- 插入图片
在docs文件夹下或者md所在路径下创建对应的图片存储文件夹img,并放入图片,然后在markdown文件中引用:

更换主题
- 安装
pip install mkdocs-material
pip install mkdocs-material
- 配置主题Material
打开mkdocs.yml,并添加一下内容:
theme:
    name: 'material'
数学公式
pip install pymdown-extensions
在mkdocs.yml中添加设置
# mkdocs.yml file

# other settings ...

markdown_extensions:
   # other extensions ...
   - pymdownx.arithmatex

# other settings ...

extra_javascript:
  # other extra java script
  - js/mathjax-config.js
  - https://cdn.mathjax.org/mathjax/latest/MathJax.js?config=TeX-AMS-MML_HTMLorMML

# other settings ...
在mathjax-config.js中设置MathJax
创建docs/js/mathjax-config.js文件,添加内容如下:
/* mathjax-loader.js  file */
/* ref: http://facelessuser.github.io/pymdown-extensions/extensions/arithmatex/ */
(function (win, doc) {
  win.MathJax = {
    config: ["MMLorHTML.js"],
    extensions: ["tex2jax.js"],
    jax: ["input/TeX"],
    tex2jax: {
      inlineMath: [ ["\\(","\\)"] ],
      displayMath: [ ["\\[","\\]"] ]
    },
    TeX: {
      TagSide: "right",
      TagIndent: ".8em",
      MultLineWidth: "85%",
      equationNumbers: {
        autoNumber: "AMS",
      },
      unicode: {
        fonts: "STIXGeneral,'Arial Unicode MS'"
      }
    },
    displayAlign: 'center',
    showProcessingMessages: false,
    messageStyle: 'none'
  };
})(window, document);
将wiki站点托管到GitHub
- 创建一个新的仓库,例如:https://github.com/user_name/repository_name
- 初始化本地仓库(my-wiki),添加远程仓库,提交本地修改并推送到远程仓库
cd my-wiki
git init
git add remote https://github.com/user_name/repository_name
git add .
git commit -m "first commit"
git push origin master
- 部署wiki站点
mkdocs gh-deploy
现在wiki站点(HTML文件)在gh-pages分支,wiki站点(markdown文件)在master分支。
该命令执行了两个动作:
1.将Mardown文件转为静态HTML网页文件
2.将所有的静态HTML网页文件都推送到远程仓库的gh-pages分支
GitHub会自动管理gh-pages分支的静态网页,就相当于一个静态网站服务器。
- 通过以下网址访问wiki
https://user_name.github.io/repository_name
参考配置
# 网站配置(网站名、作者)
site_name: Michael Blog
site_author: Michael
site_url: https://michael18811380328.git

# 博客的路径(根目录下面新建对应的目录, 通常是DOCS)
docs_dir: ./docs

# github上对应的仓库和路径
repo_name: xxx
repo_url: xxx

# 版权显示
copyright: xxx

# 项目样式包(我这里使用自定义的 material包)可以设置图标、logo、页面色调(palette)
theme:
  name: material
  # icon:
  logo: assets/logo32_32.png
  favicon: assets/seatable-favicon.ico
  # features:
    # - tabs
  palette:
    primary: deep orange
    accent:

# 插件(我使用了搜索和折叠子页面插件)可选
plugins:
  - search # necessary for search to work
  - awesome-pages

# 自定义部分(社交的链接)可选
extra:
  social:
    - icon: fontawesome/brands/github
      link: https://github.com/seatable/seatable-scripts/

# 扩展(可选)
markdown_extensions:
  - markdown.extensions.admonition
  - markdown.extensions.attr_list
  - markdown.extensions.codehilite:
      guess_lang: true
  - markdown.extensions.def_list
  - markdown.extensions.footnotes
  - markdown.extensions.meta
  - markdown.extensions.toc:
      permalink: true
      toc_depth: "1-4"

# 文件树
nav:
  - Home: README.md
  - Data structure: data-structure.md
  - Base: base.md
  - Output: output.md
  - Utils: utils.md
plugins
plugins:
  - mkdocs-jupyter:
    include: ["*.py", "*.ipynb"]
    execute: True
    include_source: True